
Log in to Svija Cloud at yourwebsite.com/c
Fonts in Svija Cloud
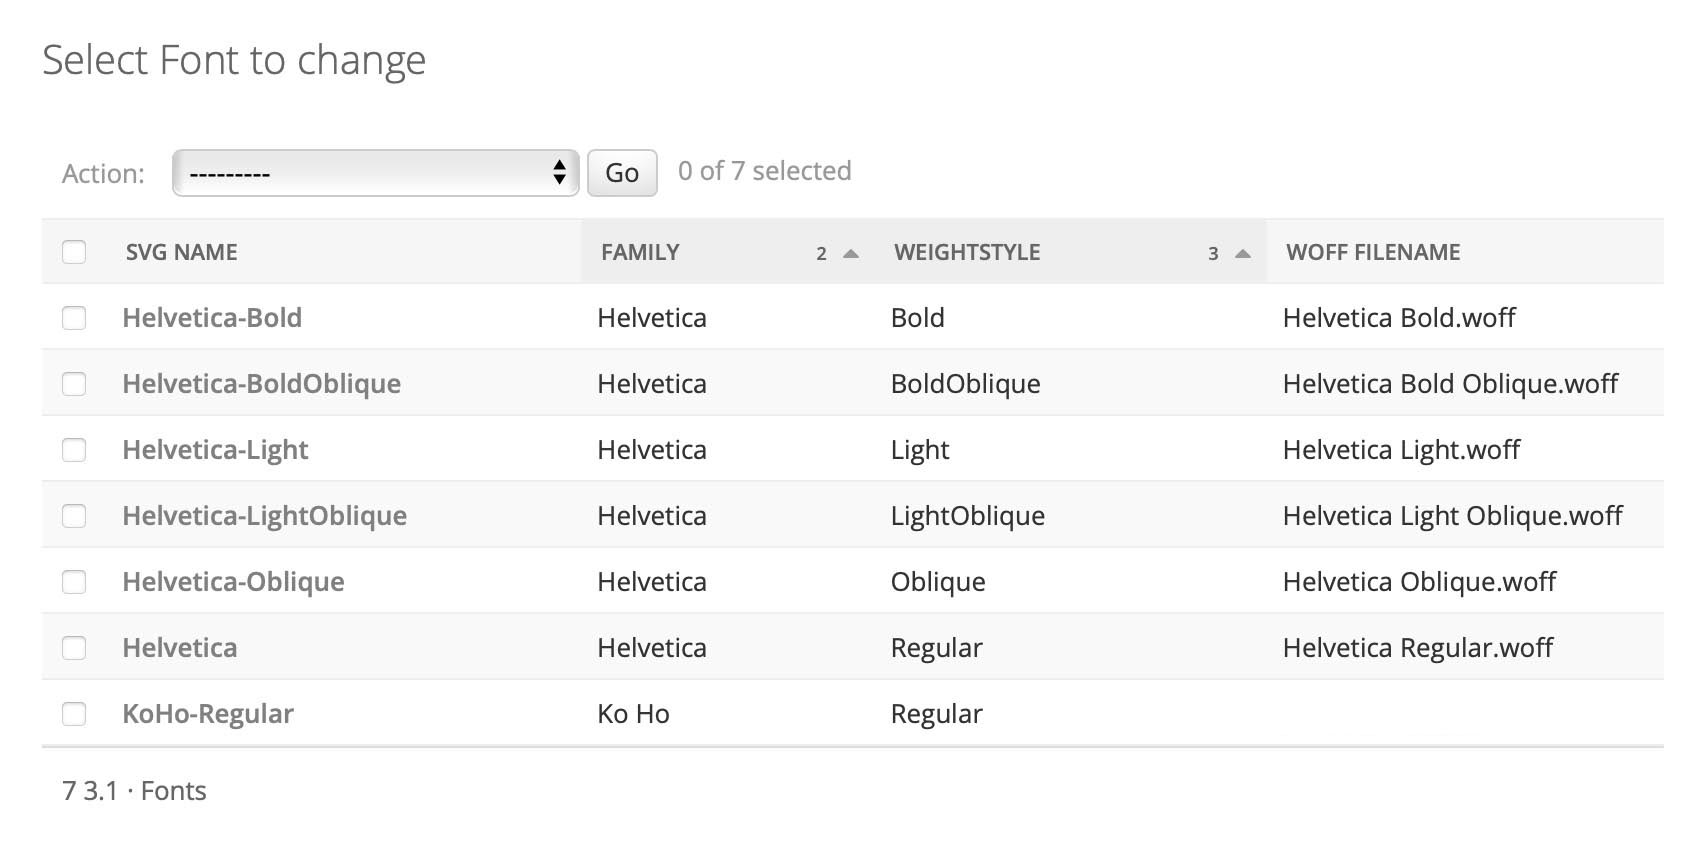
When you use a new font in Adobe Illustrator, it will be added to the Fonts section of Svija Cloud the first time the page is visited:
To configure the font, click on it. You will see the window below.
When it is first added, you will see that Google Font is unchecked and WOFF Filename and Adobe CSS are empty:
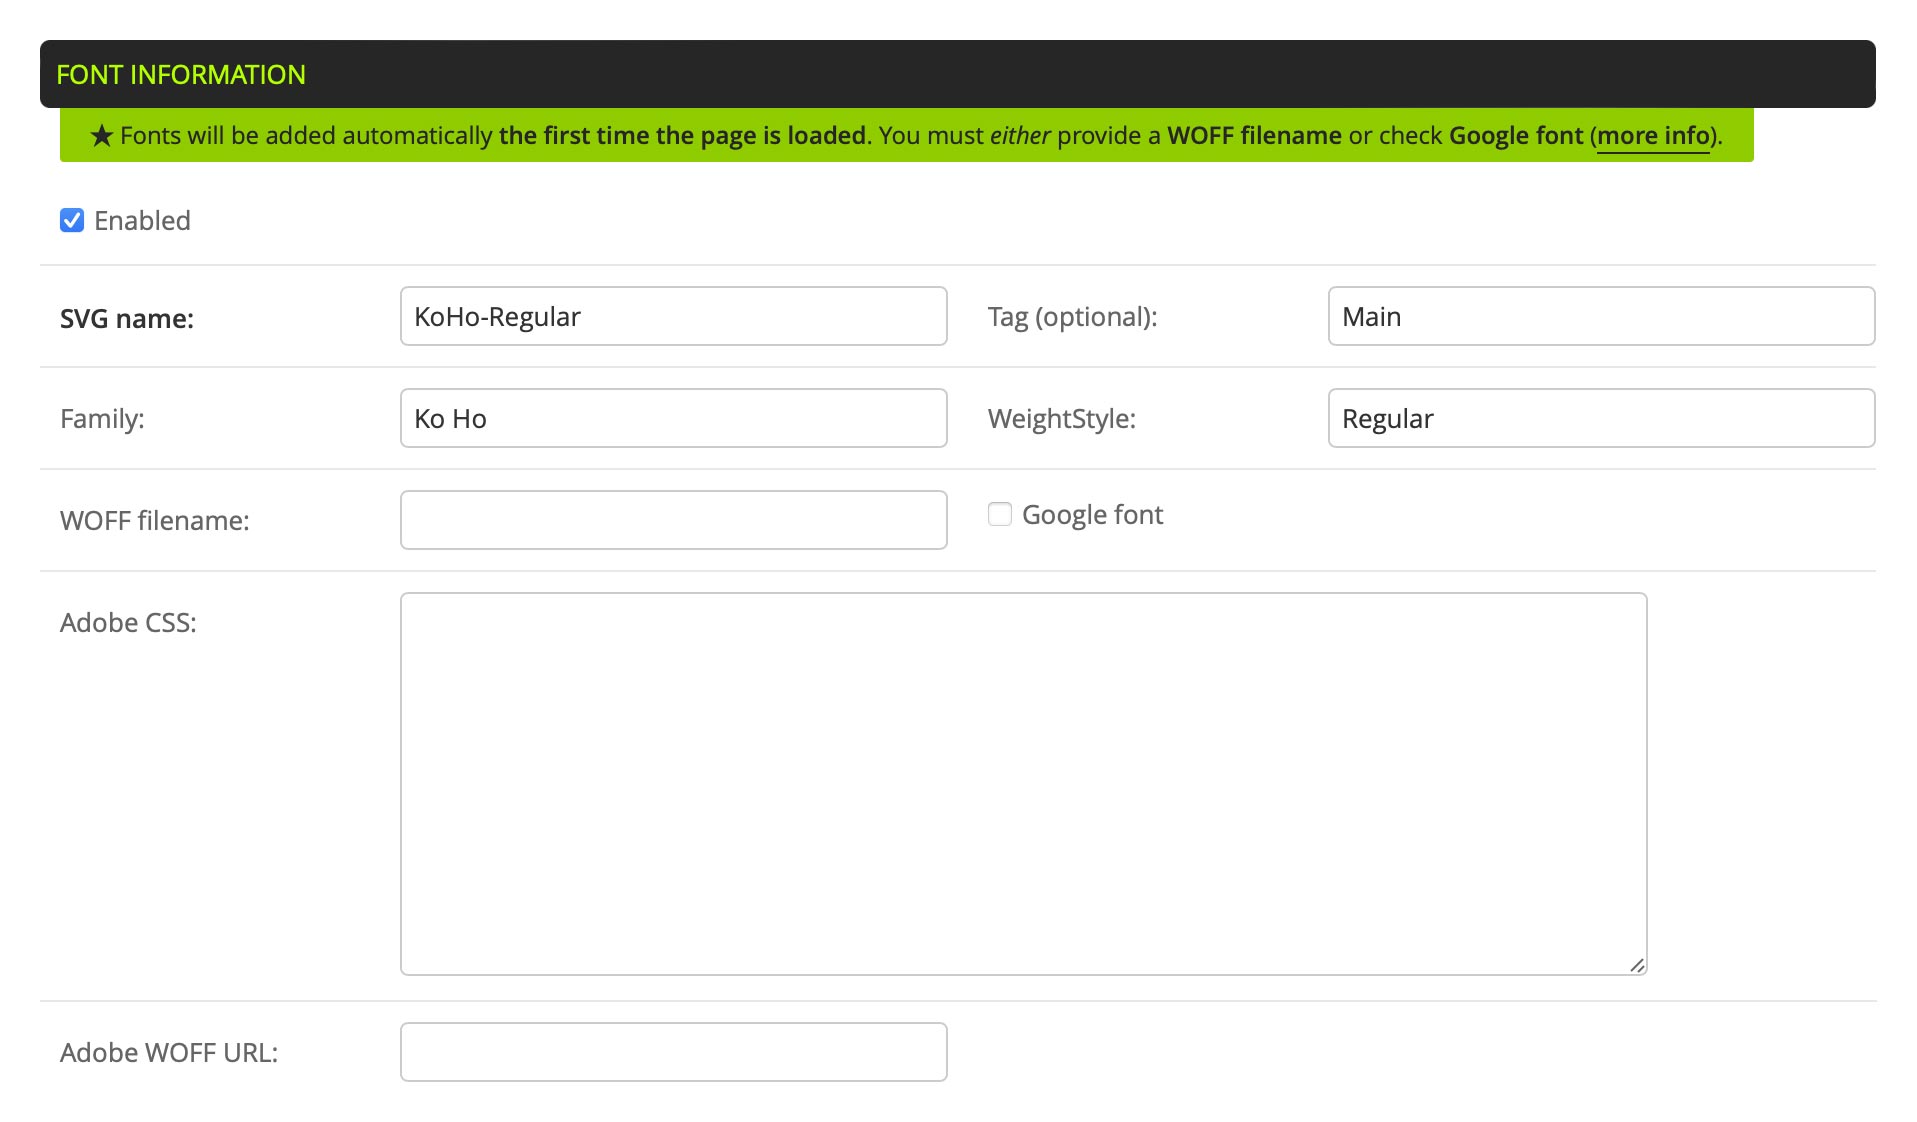
NEVER CHANGE “SVG NAME”: The SVG name is the CSS reference inside the SVG file.
Adobe Fonts
To configure Adobe fonts:
- open the Adobe CC app on your computer and click “Adobe Fonts” in the right column
- select the font that you want to install
- click the square with an arrow (share icon) in the right pane (this will launch the Adobe website)
- click the </> link to add the font to a web project (create one project per website)
When you have successfully added the font to a project, you will be presented with the following screen:
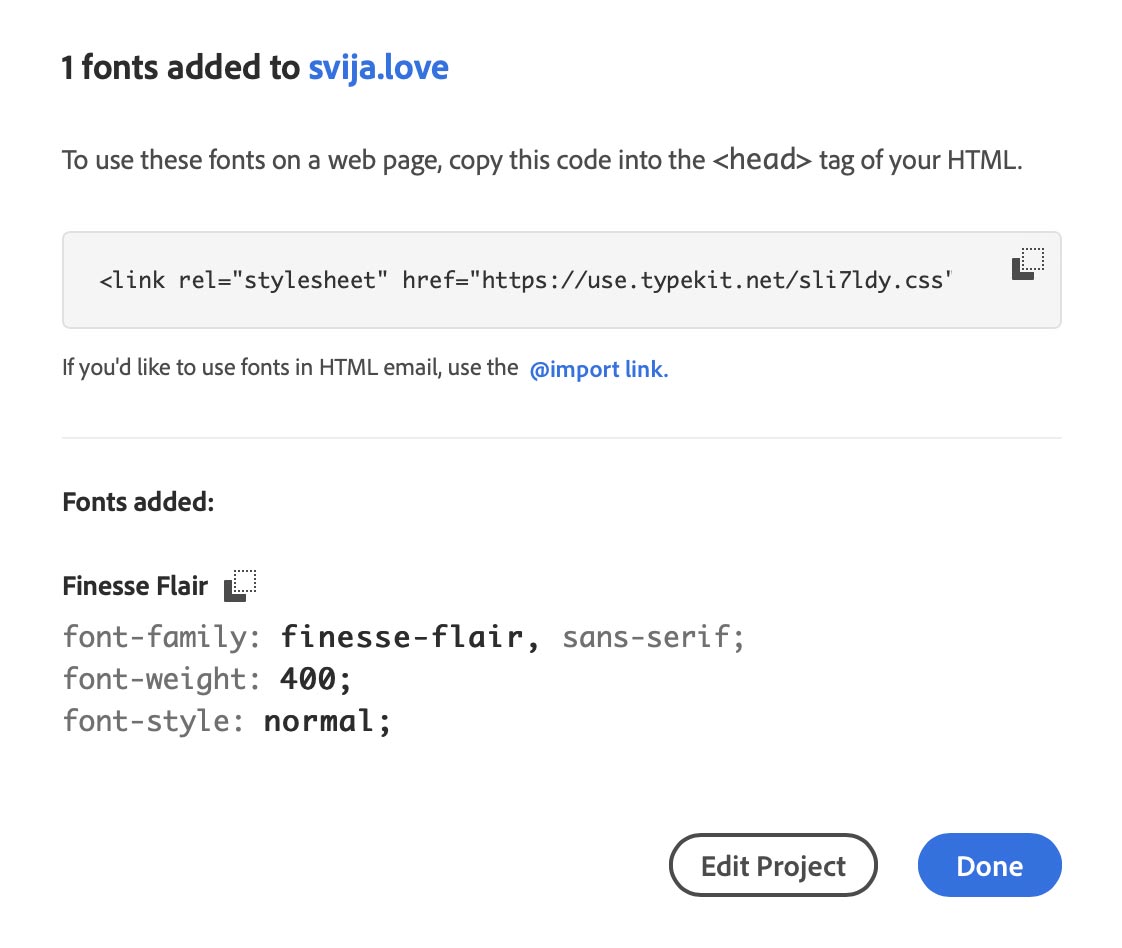
Click on the double box “copy” icon to copy the text that looks like this:
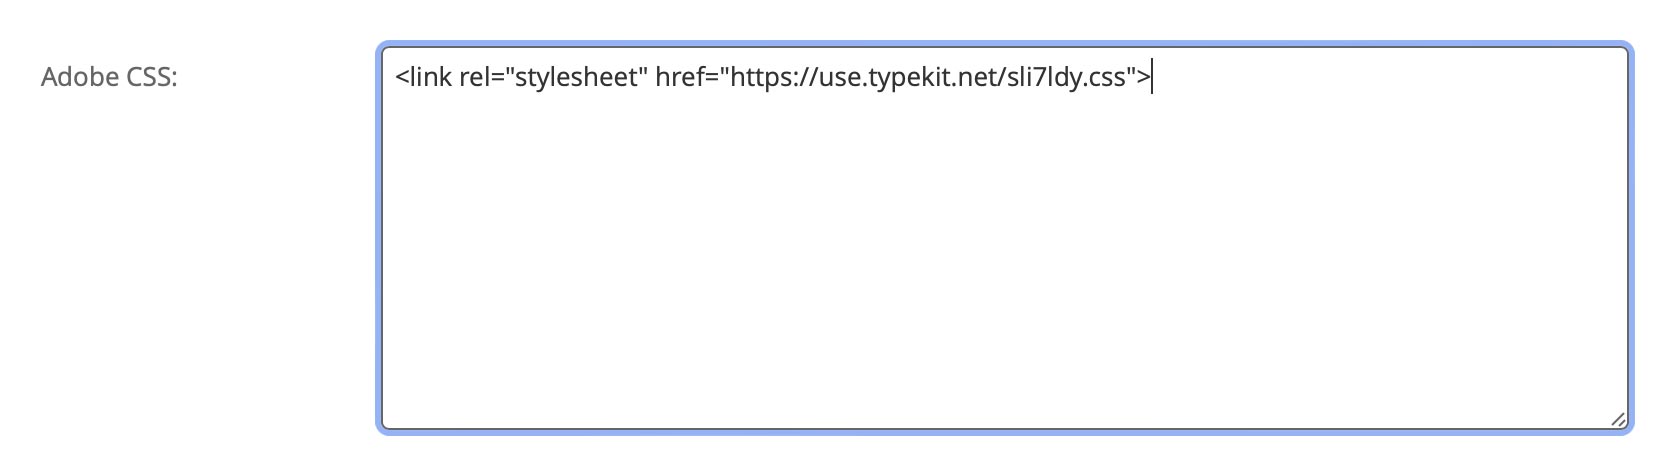
<link rel="stylesheet" href="https://use.typekit.net/sli7ldy.css">Then simply paste that text into the field labeled Adobe CSS in Svija Cloud, and click Save:
The next time you visit your page, the font should be activated.
If there are problems: Adobe replaces the Weight value with a number. Make sure that the weight is correct:
- 100 · Thin
- 200 · Extra-Light
- 300 · Light
- 400 · Regular, Book
- 500 · Medium
- 600 · Semi-Bold, Demi
- 700 · Bold
- 800 · Extra-Bold
- 900 · Black
The Style value should contain Normal, Italic, Oblique etc.
Google Fonts
Google fonts should work automatically, but it they don’t, there are two possible solutions:
1. Replace the Weight with a Number
It is sometimes necessary to replace the Weight value with a number. Google prefers numbers to weight names:
- 100 · Thin
- 200 · Extra-Light
- 300 · Light
- 400 · Regular, Book
- 500 · Medium
- 600 · Semi-Bold, Demi
- 700 · Bold
- 800 · Extra-Bold
- 900 · Black
If you want the font to be italic, just add it to the Style field: italic.
2. Try different Capitalization and Spacing
Some font names have unusual capitalization or spacing. If a font is not working, it may be because the family name is missing a space or has an extra space. For example:
- try changing OpenSans to Open Sans
- try changing Ko Ho to KoHo
Fonts on Your Mac
Note: for purchased fonts, you may be required to buy a web version separately.
Follow these steps to use macOS fonts with Svija:
- locate the original macOS font
- create a WOFF version of the font at convertio.co
- download the WOFF file to Svija/Fonts/WOFF Files
- enter the WOFF filename in Svija Cloud
For this example, let’s use Bradley Hand Bold font in the home page. First, we find the original font file by right-clicking it in FontBook and selecting Show in Finder.
Creating a WOFF Version of the Font
Go to convertio.co to make a WOFF version of the font:
- click Choose Files
- under “to” select Font › WOFF, then click Convert
- when the conversion is done, download the font into SYNC/SVIJA/Fonts/WOFF Files/
Keep a copy of the TTF or OTF version in SYNC/SVIJA/Fonts — it’s helpful for your collaborators, and automatic font conversion is coming soon 😉
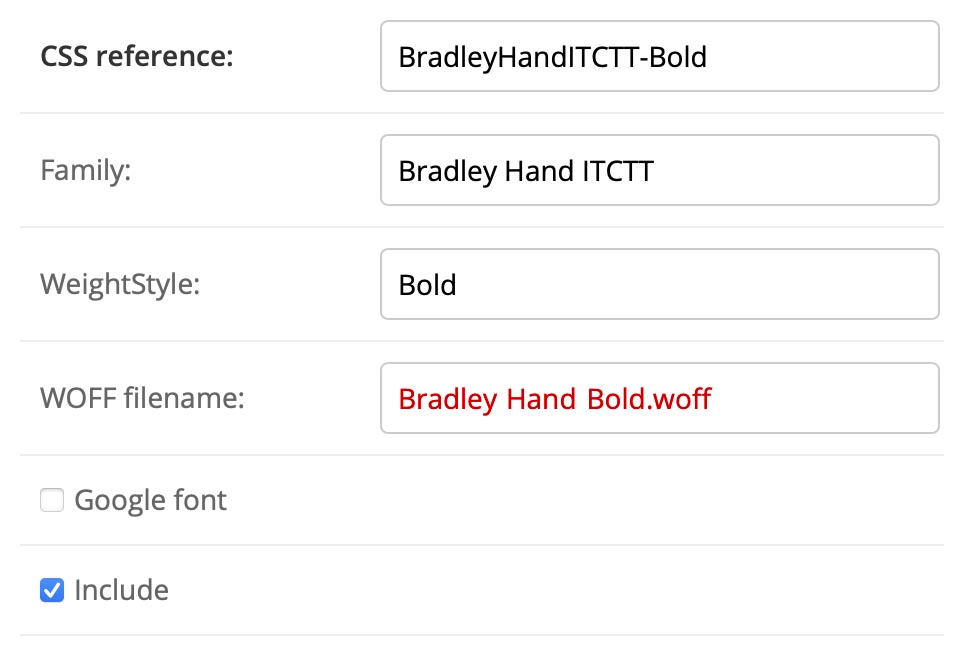
Enter the WOFF Filename in Svija Cloud
To finish the process we just need to copy the name of the WOFF file to Svija Cloud:
- in the Finder, copy the name of the converted font (BradleyHandITCTT-Bold.woff)
- in the Svija Cloud font list, click on BradleyHandITCTT-Bold to open the settings page
- paste it the WOFF name, replacing SOURCE NEEDED:
After you’ve clicked SAVE, the page should work.
N.B.: for WOFF files, the Family and WeightStyle field values are irrelevant.
Pages in this section: