
We have made this page as simple as possible. If you have ideas for making it easier, please email us!
Svija works by continually keeping these two folders synchronized:
SYNCon your website’s server — used to display your websiteSYNCon your computer – where you design your website
The sync folder on the server already exists — this page helps you copy it to your computer.
1. Configure WinSCP
Open WinSCP and enter the information from your Svija email:
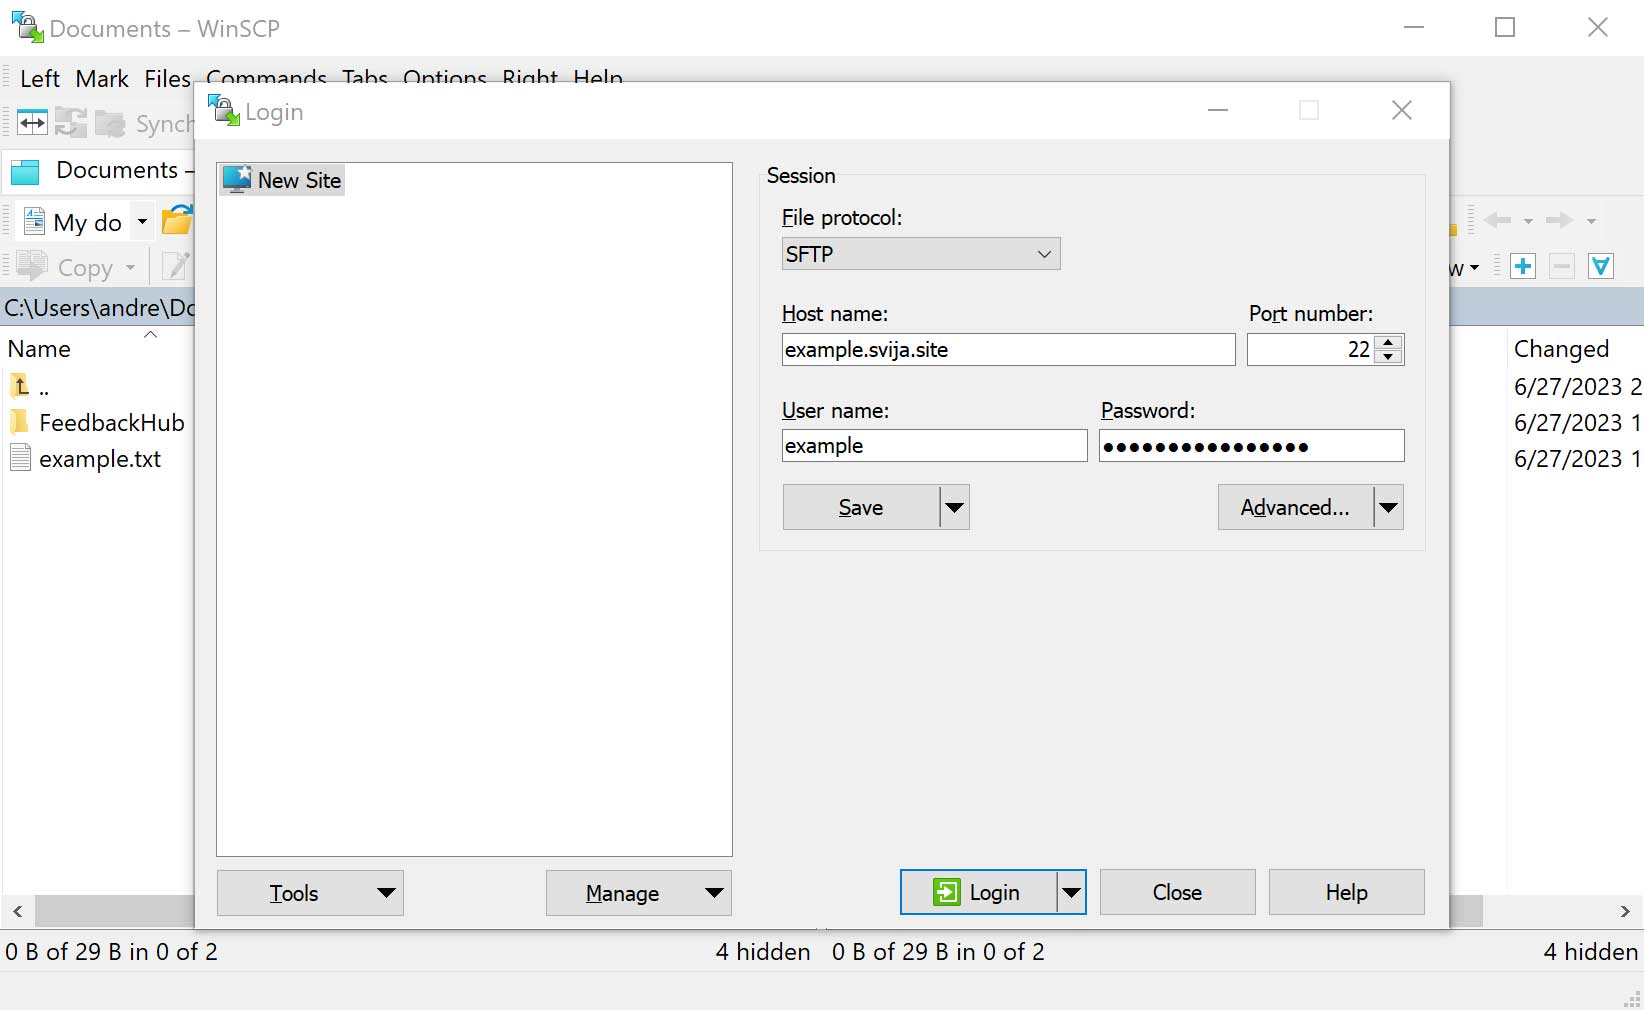
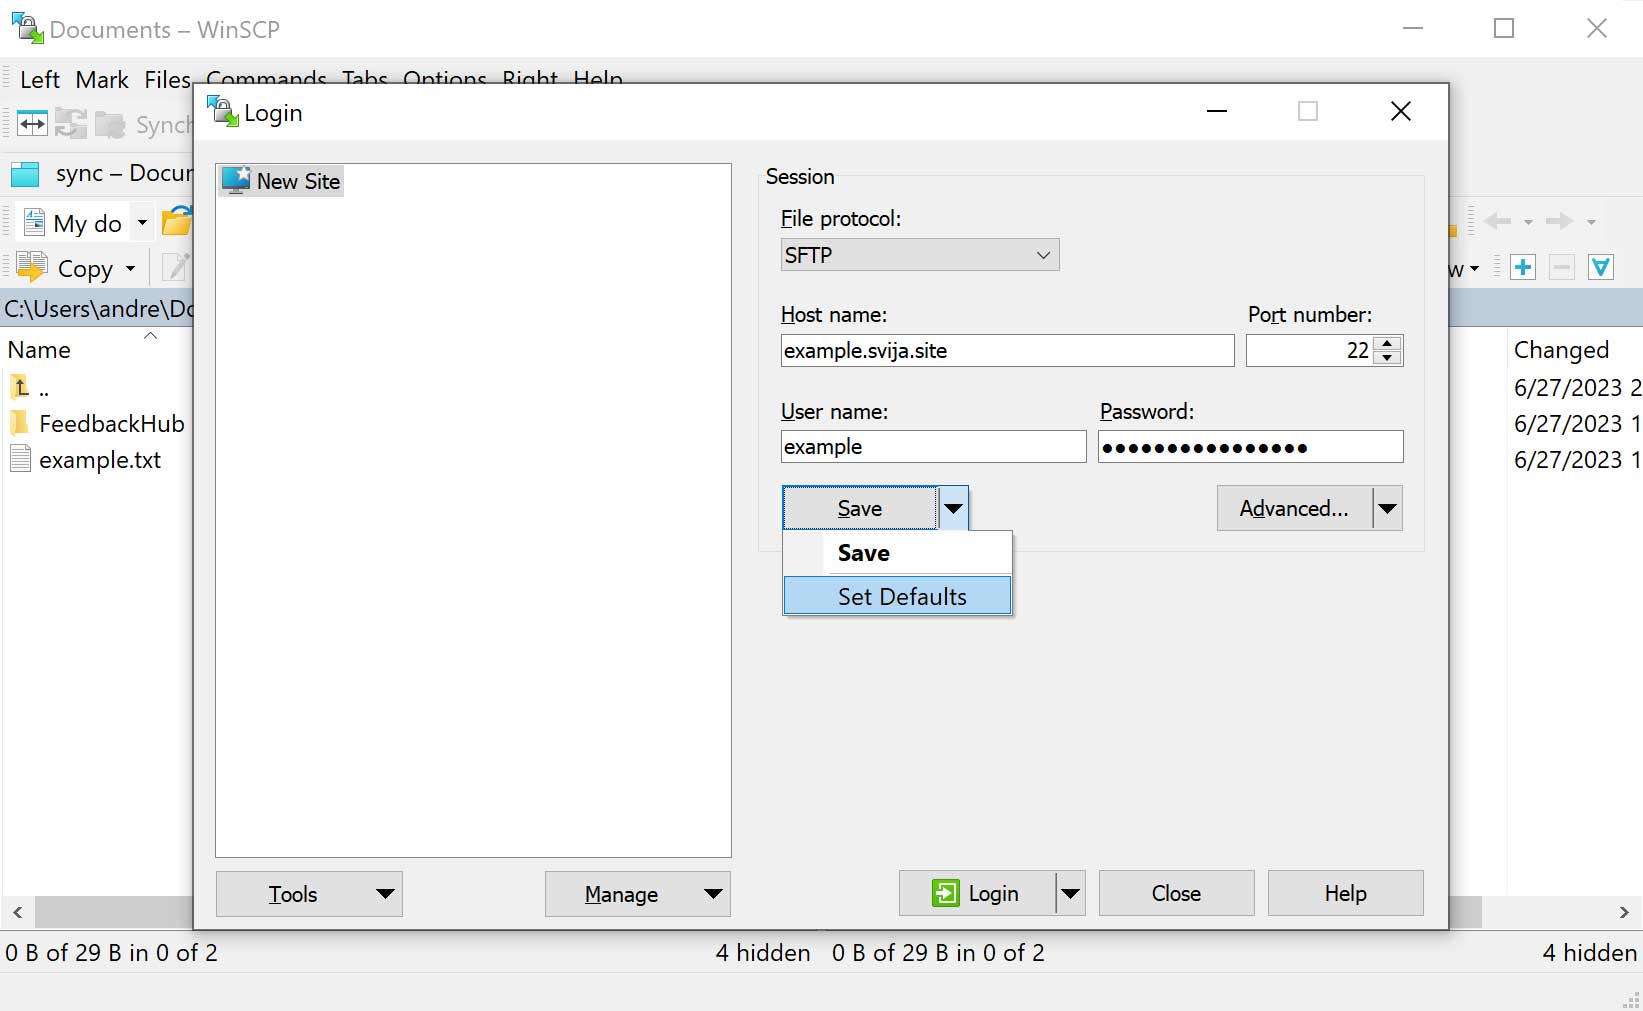
Click the arrow to the right of the Save ▼ button and choose Set Defaults
Click the green Login button to connect to your site
- Choose Yes when asked “Continue connecting to an unknown server?“
At this point, you should see your documents in the left pane and your website files in the right pane:
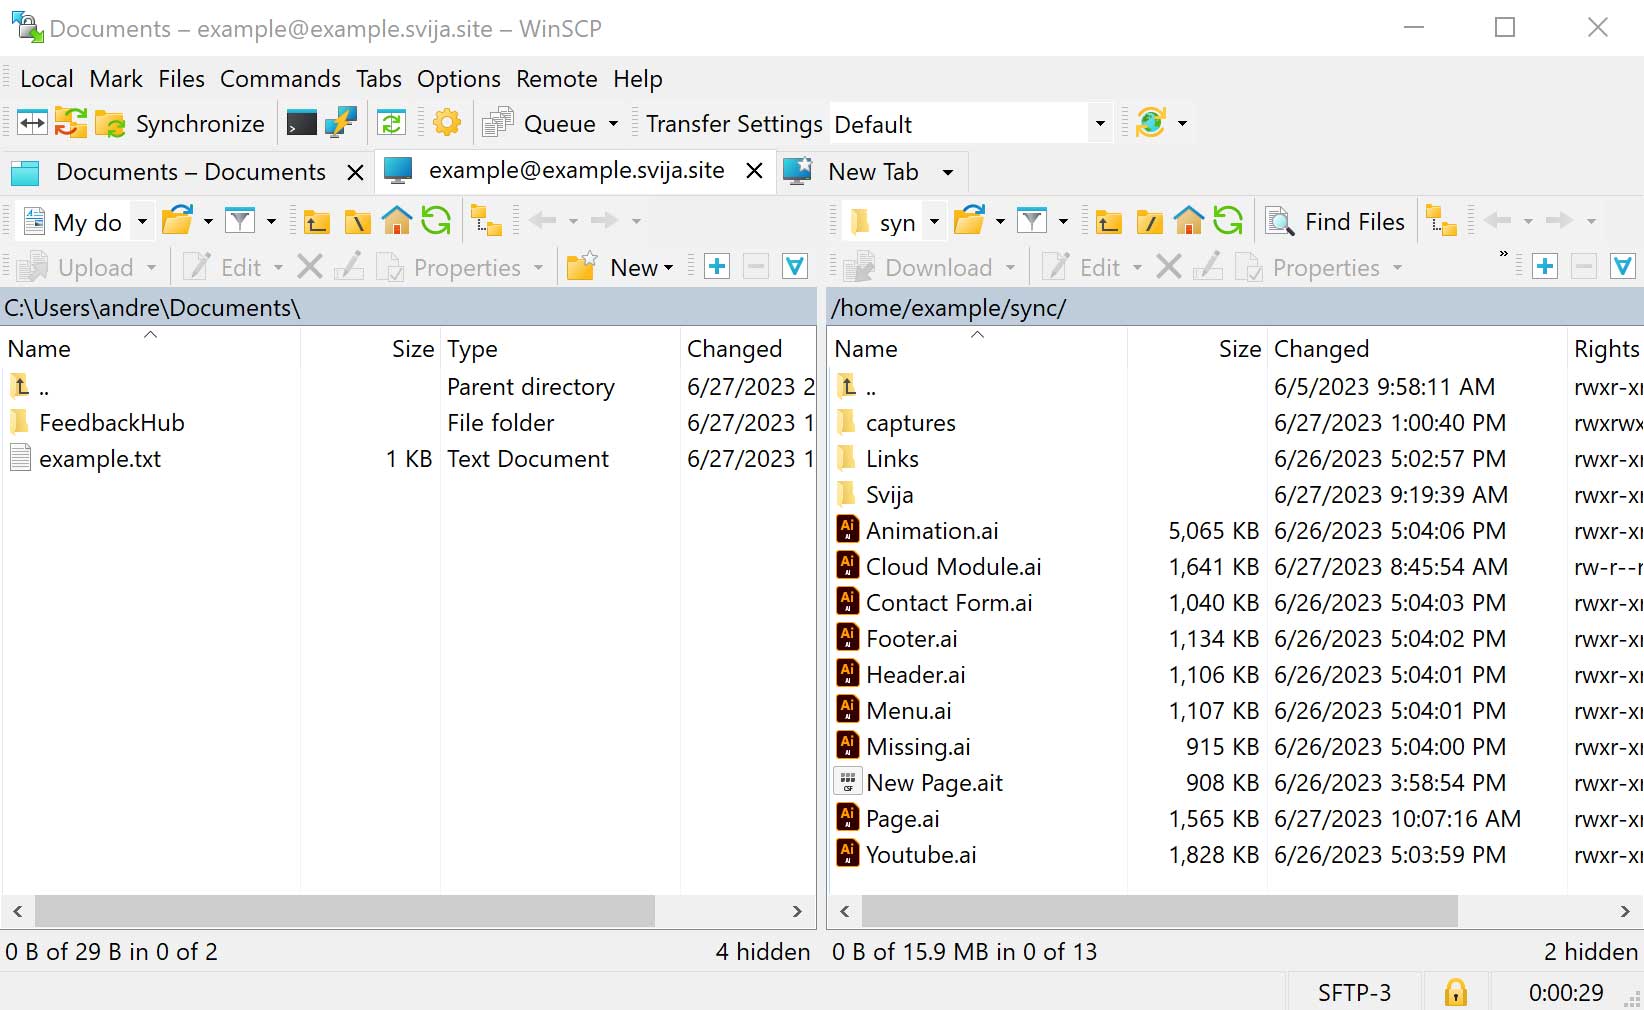
Note: SYNC must be uppercase even though in the image it is in lowercase.
2. Download Your Website Files
In the left pane of WinSCP, navigate to where you’d like to store your website, then:
- create a folder (F7) with the name of the website (example.svija.site)
- create a folder inside that called
SYNC - double-click until you are inside the
SYNCfolder
To download your website, select everything in the right pane except the “..” and drag it to the left pane:
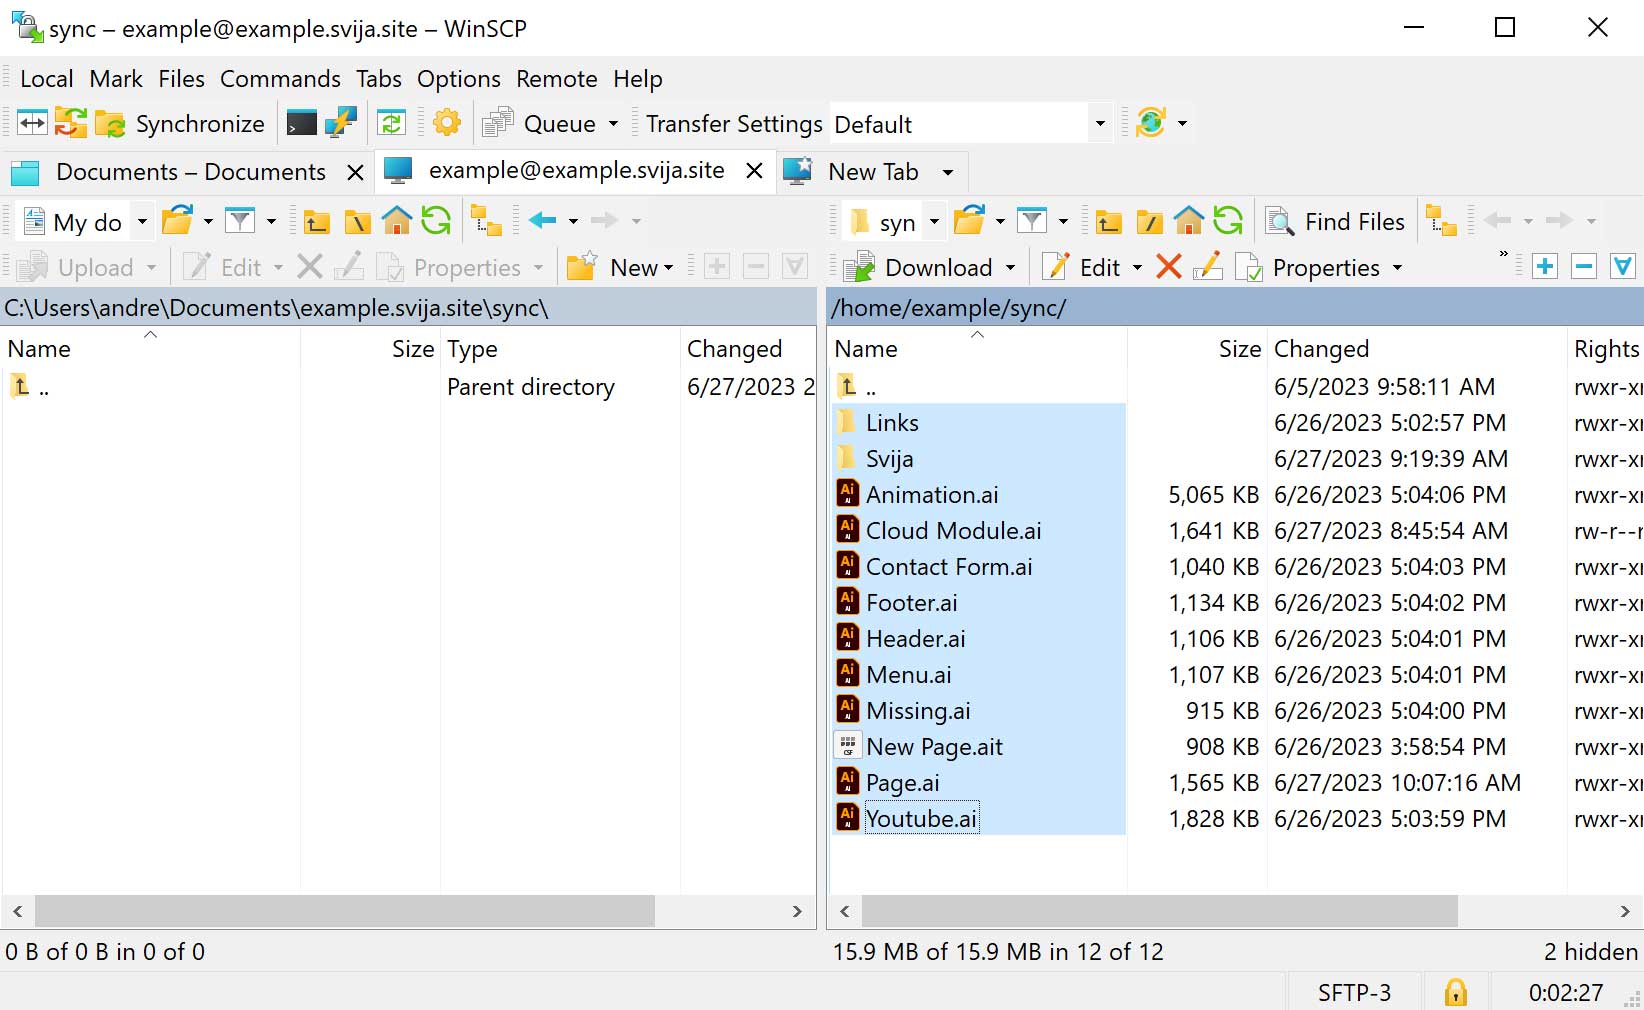
The “..” is not a real folder — it’s a shortcut to the parent folder.
3. Save the Configuration
Type ctrl-N to bring up the Login window, then
- select your website
- click the Advanced ▼ button
- in the left column choose Directories
Fill out the directories as follows:
- Remote:
/home/example/SYNC
replace “example” with your Connect ID - Local: click … and navigate to the sync folder from the previous section
- check Synchronize browsing
- click OK
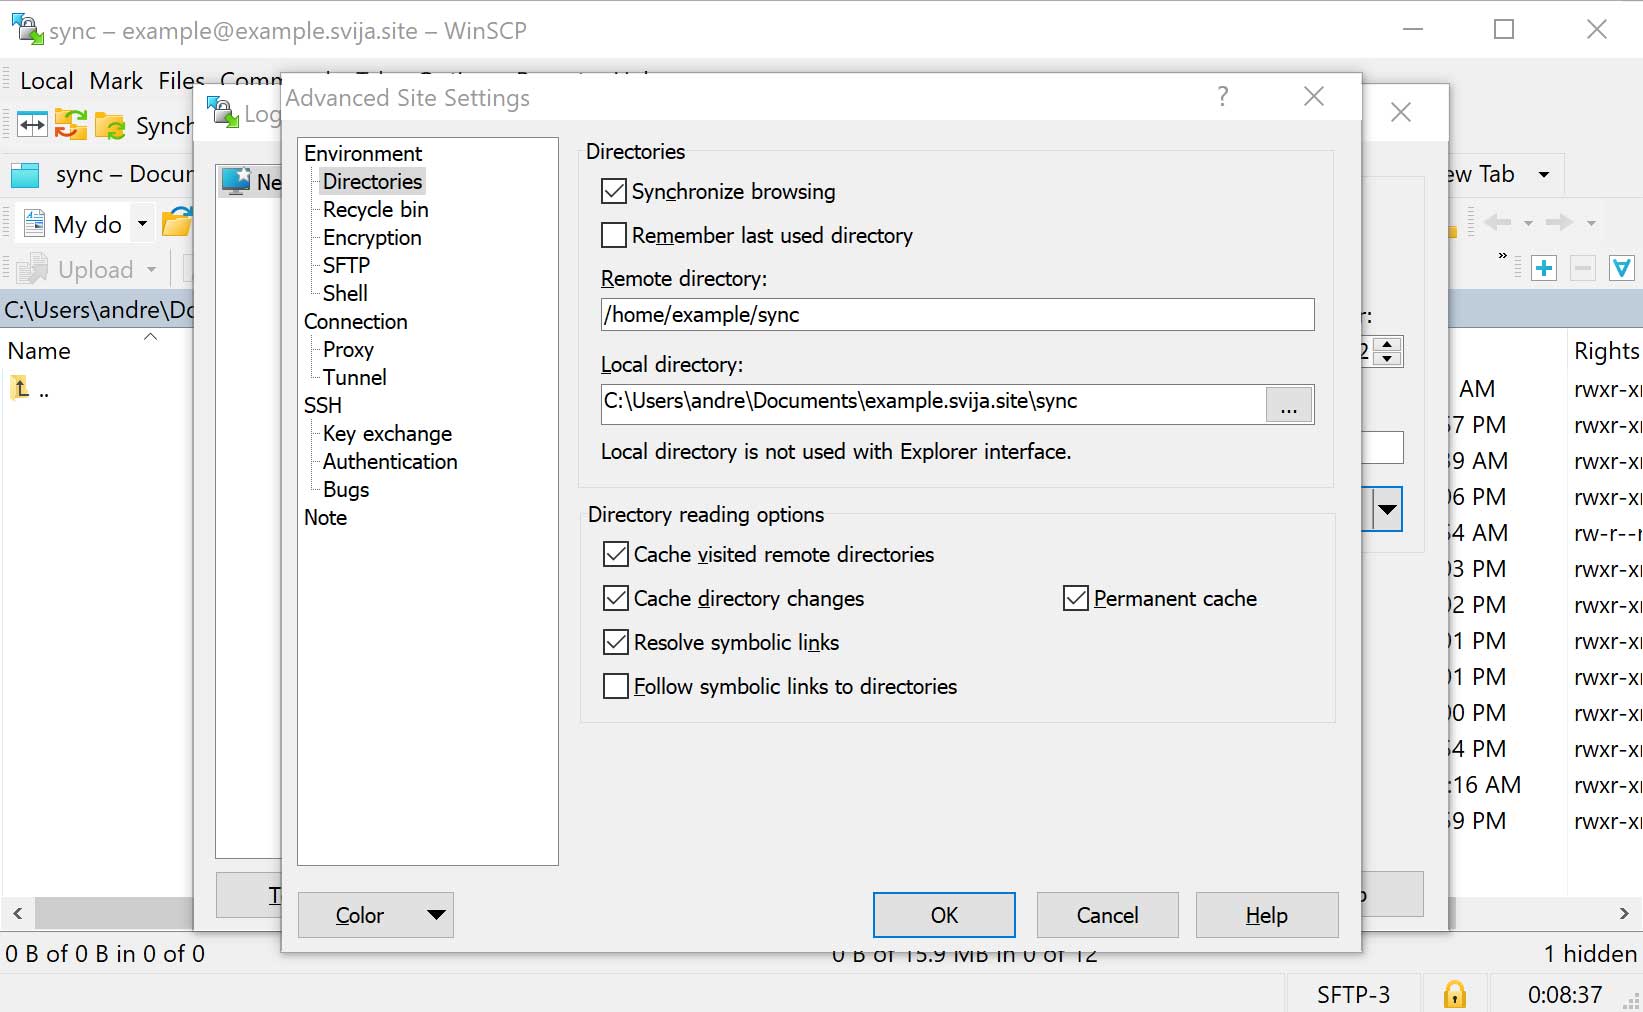
Note: SYNC must be uppercase even though in the image it is in lowercase.
You’ve successfully downloaded your website
Now you’re ready to try changing the text on a page.